I love homemade breads and this Skillet bread is mouthwatering delicious and so easy to make. Once I figured out the process, baking bread has never been easier! You only need a few ingredients, a cast iron skillet, and bit of time! Let me take you on a journey of making a fabulous aromatic bread that you will want to make again and again!

This post may include affiliate links that earn us a small commission from your purchases at no extra cost to you.
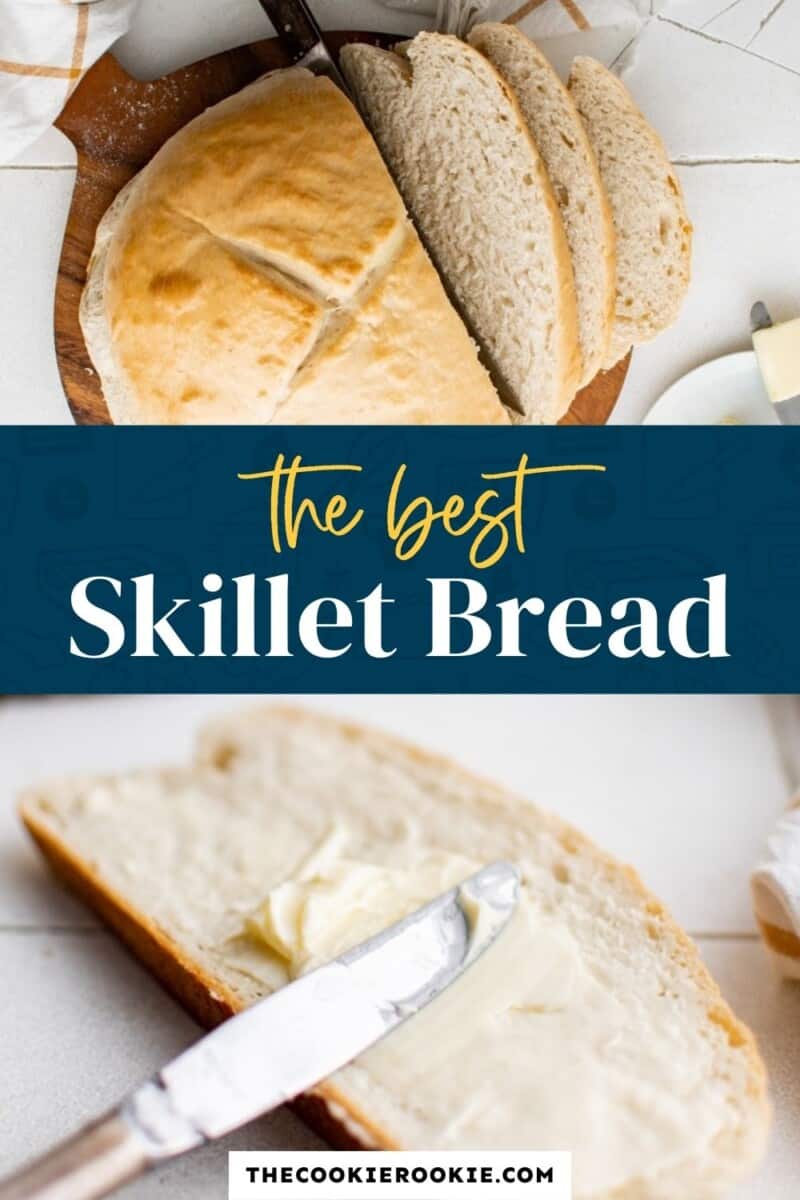
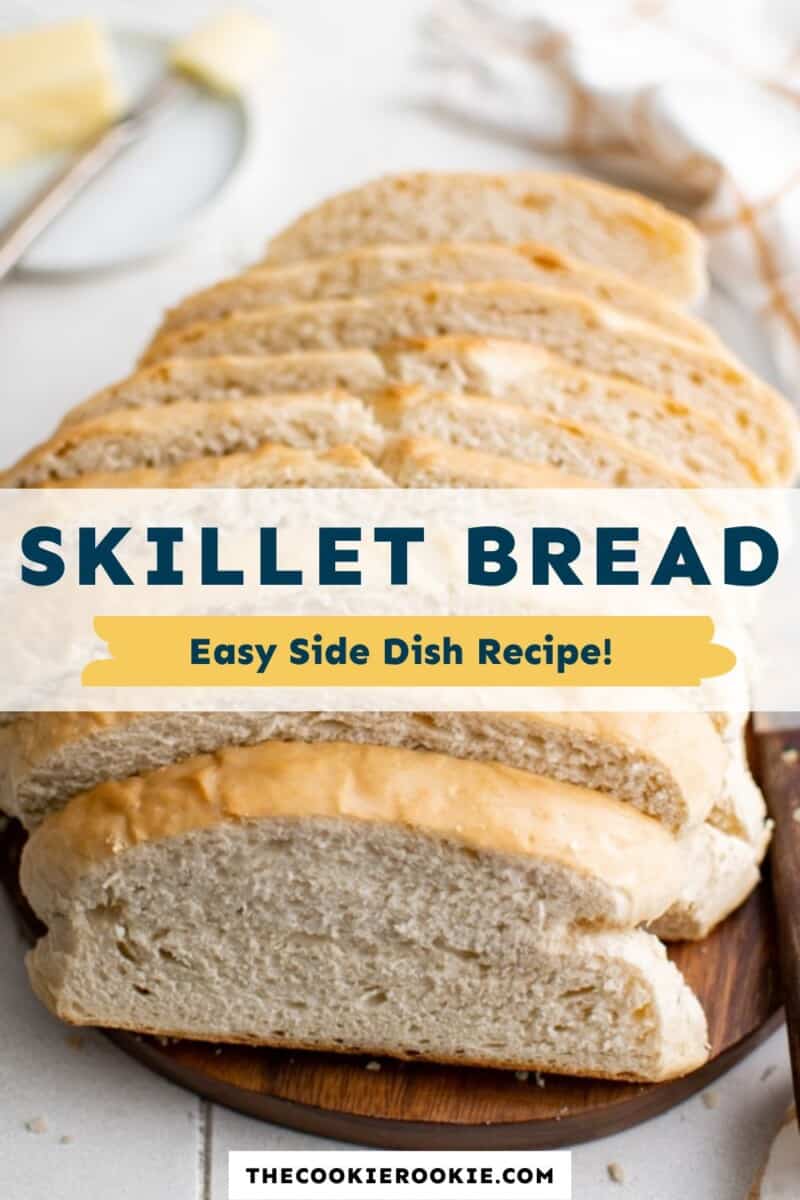
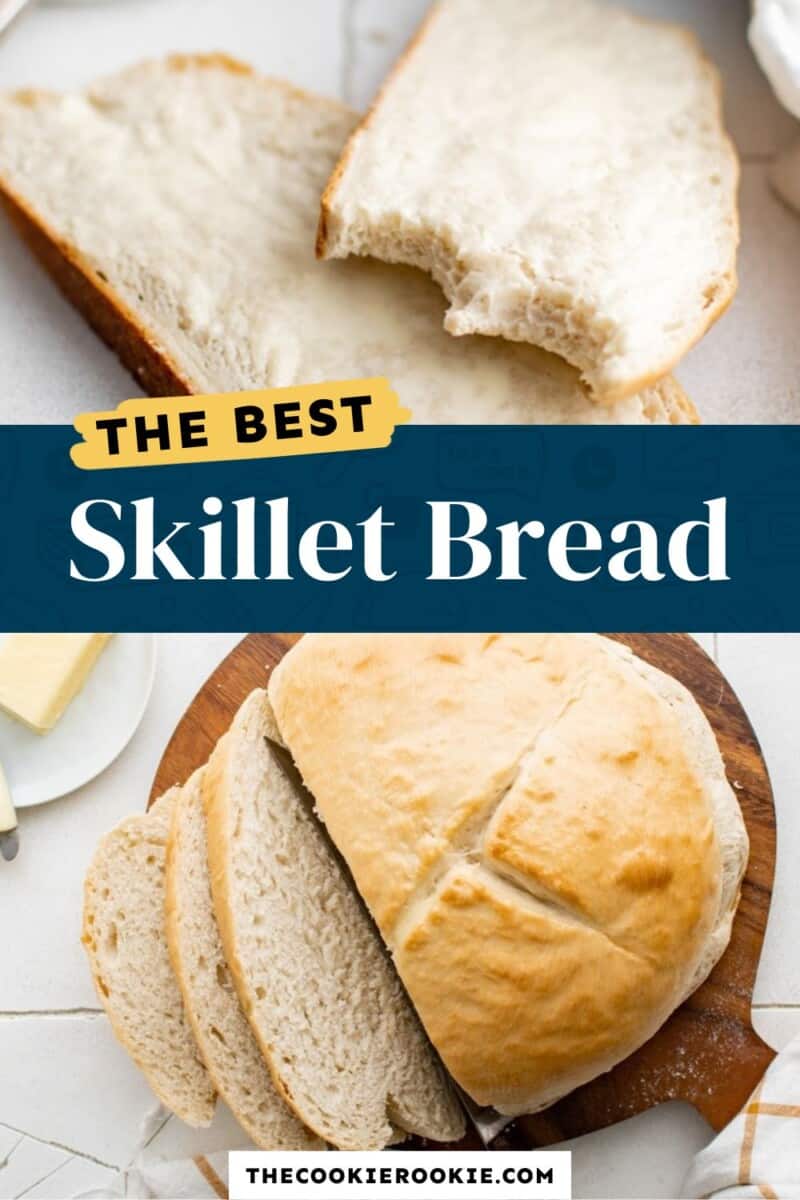
Skillet bread is a simple, rustic loaf of bread baked in a cast iron skillet! It has a crusty outside and soft inside, making it the perfect side to any meal!
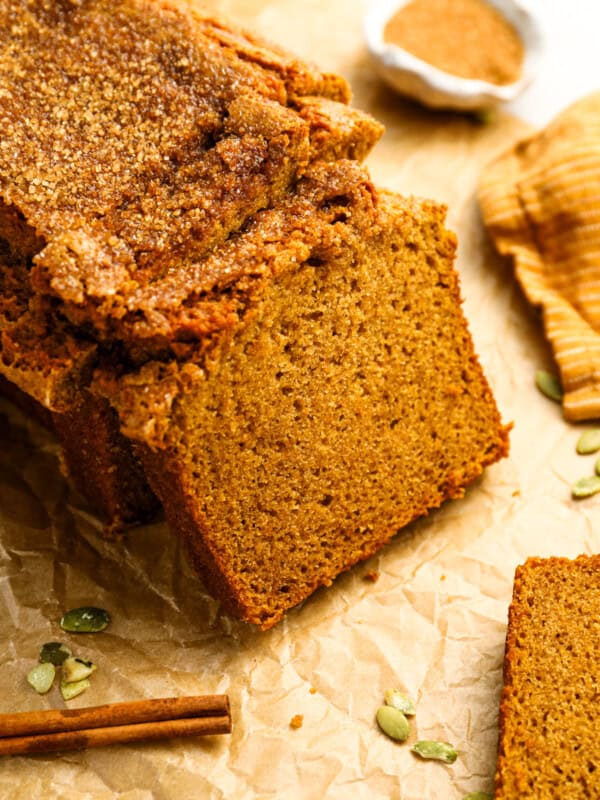
If you’re like me and enjoy baking rolls, breads, or muffins, try my breakfast English Muffins or Sweet Bread to bake during Easter or a fresh loaf of white bread for crunchy sandwiches. If I’m feeling lazy, then No Knead Dutch Oven Bread and No Knead Sandwich Bread are perfect!
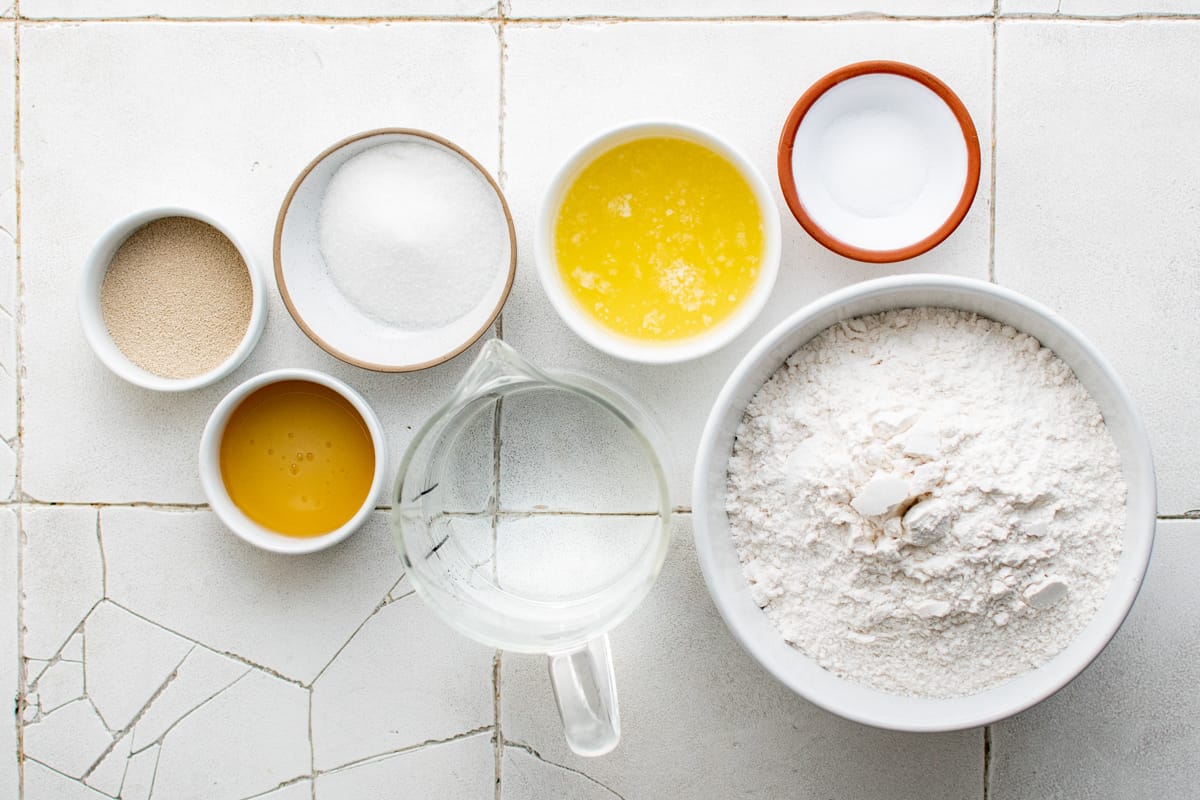
To make my Cast Iron Bread Recipe, all you need are a few simple ingredients (7 to be precise) and a skillet. I have also tried 5 ingredient bread, which is just as delicious.
Cast Iron Skillet Bread
When bread is baked in a cast iron Dutch oven, it is usually covered for the first 30 minutes or so of baking, which creates steam. This steam helps the bread to rise higher and form a crispy crust. When the bread is baked in a cast iron skillet, it is uncovered the whole time and comes out a bit shorter and with a softer crust.
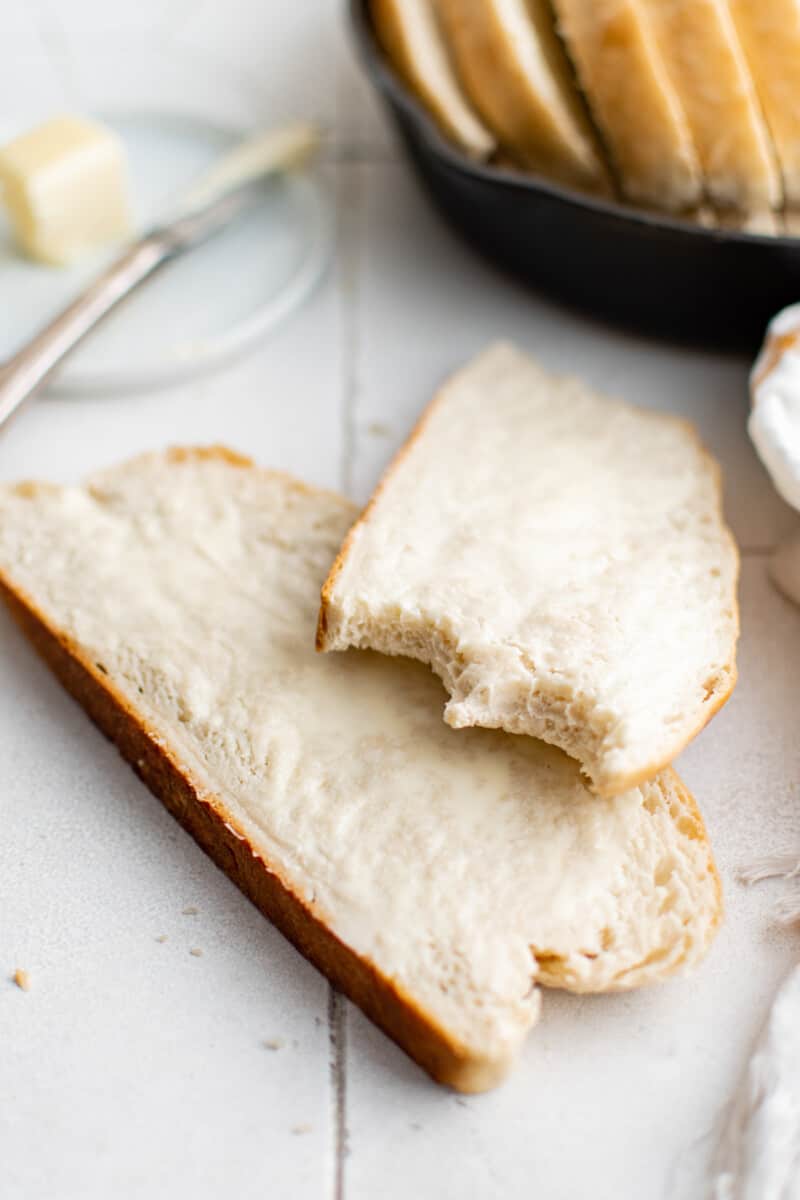
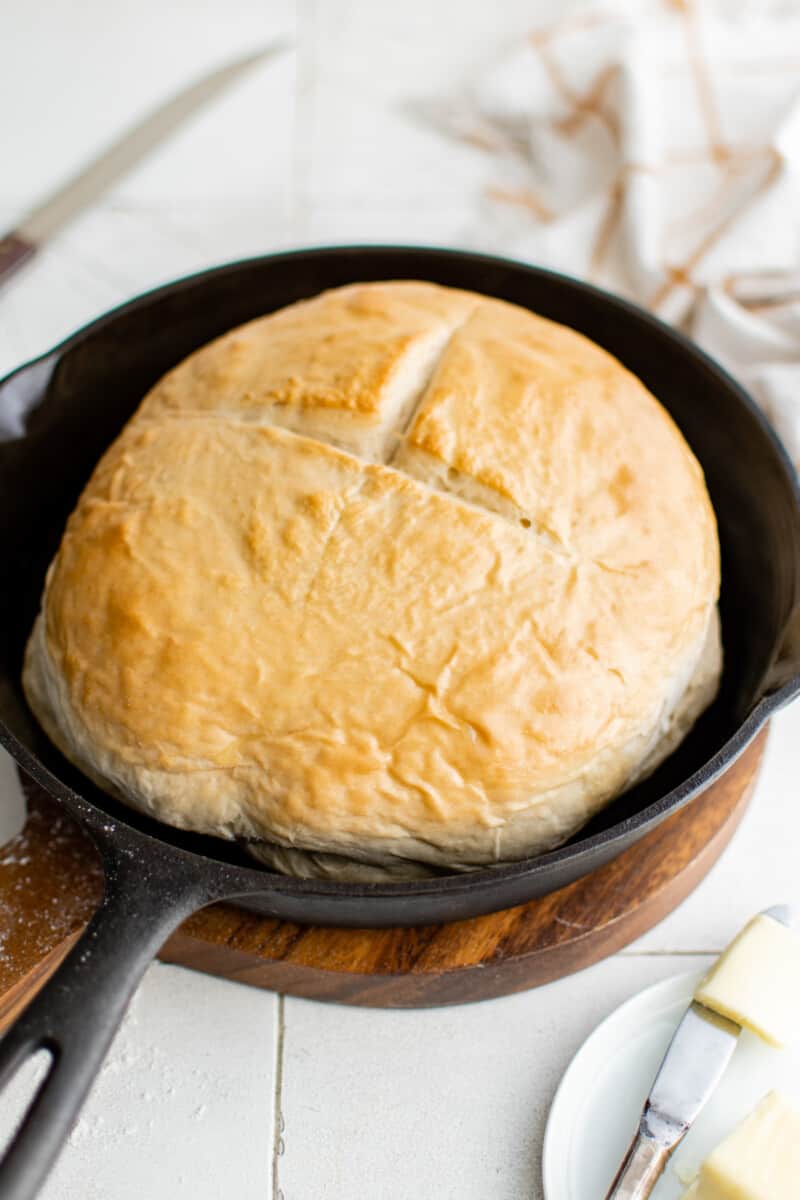
Whip this up in less than 15 minutes and let it rise while you make dinner. Once it’s golden brown, take it out and allow it to rest. The kitchen is going to smell wonderful! Once the bread has cooled, slice and serve with a pat of butter and some honey for the ultimate mouthwatering experience!
This recipe can be easily doubled and baked in 12-inch cast iron skillet. Add an additional 10-15 minutes to the baking time if doubling.
Given this recipe is still baked bread, it will require roughly 20-25 minutes to bake in the oven once prepared. On average, this is roughly half the time of other baked bread recipes without a skillet but recipes will vary.
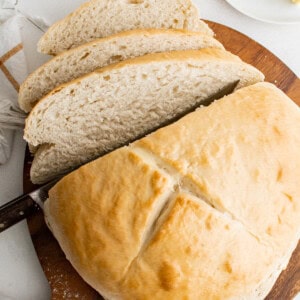
Scoring Skillet Bread
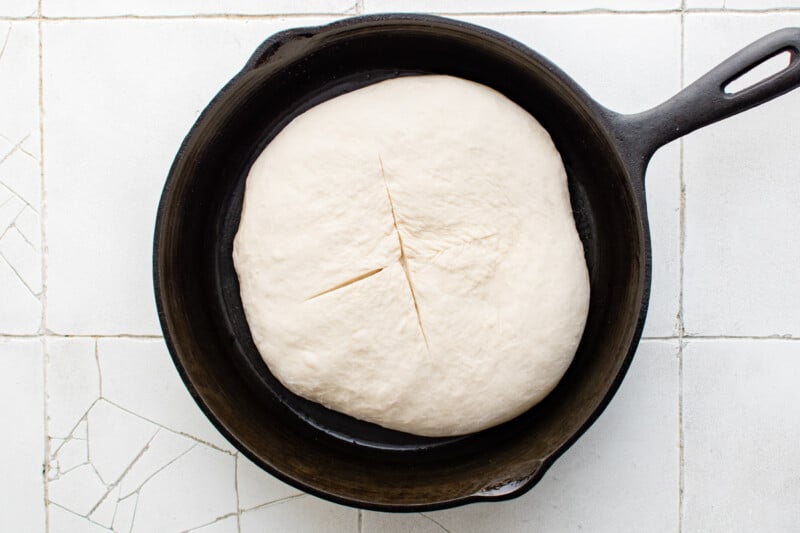
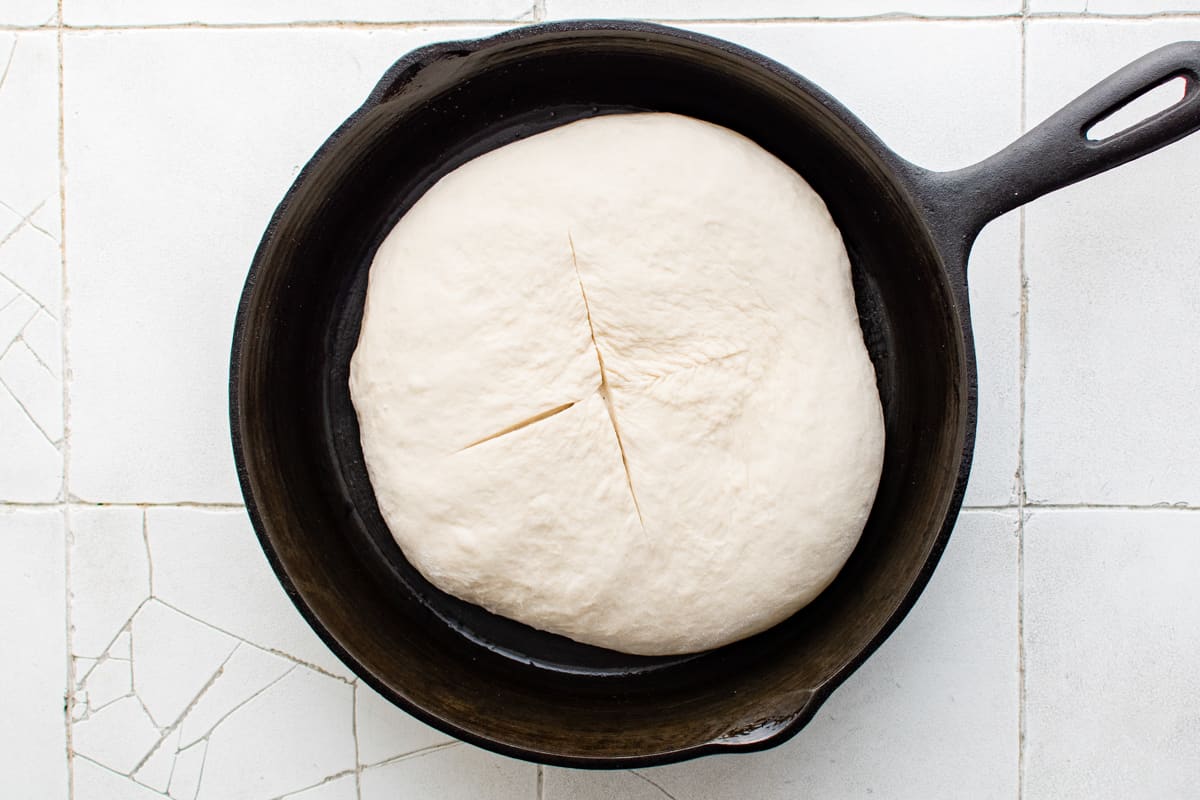
Baking a crusty bread like this requires scoring the top of the dough before placing it in the oven. This is to help the steam vent while it cooks. Also, the dough will naturally want to expand as it bakes, and creating a vent guides the dough, so that it doesn’t ooze out of the sides.
You can make any design or shape you like when scoring (cutting into the outer layer of dough). A simple X looks nice and is easy to do, but you can get creative if you like.
Ingredients
- Water: You’ll need warm water. It helps in proofing the yeast.
- All purpose flour: I prefer to make my breads with all purpose flour. It creates the best light and fluffy texture.
- Sugar: It acts as an agent in proofing the yeast.
- Dry Active Yeast: I’m using active dry yeast. If using instant yeast, no need to proof. Simply mix all the ingredients together and proof the dough.
- Honey: After sugar, honey helps in activating dry yeast.
- Kosher salt: I always prefer kosher salt over table salt.
What does it mean to “proof” yeast?
To ‘proof yeast’ means to dissolve it in warm liquid (often with a little sugar) and leave it for a few minutes or until it is foamy. Proofing yeast ensures it is alive and vigorous enough to make your dough rise.
Why is my skillet bread dough so sticky?
This bread dough is meant to be a bit sticky, but if it is too sticky to work with, you can simply add more flour, a little at a time, until it is workable.
Why didn’t my skillet bread rise properly?
Skillet bread does not rise as high as more traditional loaves of bread. However, if your skillet bread seems super dense and pancake-like, your yeast may be expired. Check the date on your yeast and discard any out-of-date envelopes. Furthermore, be sure to bloom the yeast in warm (not too hot!) water so that you don’t kill it with too much heat.
Variations and Substitutions
- If using instant yeast, you can mix the flour, sugar, and yeast together and skip straight to step 3.
- For chewier, crustier skillet bread, use bread flour in place of some or all of the all-purpose flour.
- Feel free to add the herbs of your choice to this bread, such as rosemary, basil, or thyme.
- You could also add granulated garlic or onion.
Tips For Success
- In place of the butter, you can use neutral oil or olive oil or vegan butter.
- Omit the honey for a more savory bread.
- For a softer crust, brush the bread with butter as soon as it comes out of the oven.
- Check your yeast before using it. If it is past its expiration date, toss it and use a new envelope.
- Knead the dough until it is tacky, but not wet. It should be somewhat smooth.
- Perfectly proofed bread dough will spring back slowly when poked with a clean finger. If the dough springs back quickly, it needs more time; if the does not spring back at all, it is over-proofed.
- If your kitchen is too cold and your dough is not rising, place the bread dough in your turned-off oven with just the light on to rise.
- Bake this bread only in a cast iron skillet. A different type of skillet will not get hot enough or distribute the heat evenly enough.
- Fully baked bread will read 200°F internally on an instant-read thermometer.
How to Store and Reheat
Store leftover skillet bread in an airtight container at room temperature for up to 5 days. Do not refrigerate homemade bread.
Make ahead: The dough can be prepped through step 5 up to 1 day in advance. Simply place the dough in the refrigerator to rise rather than on the counter. Let the dough sit out on the counter for 30 minutes before shaping and baking.
Freeze: Freeze skillet bread whole or in individual slices tightly wrapped in 2 layers of plastic wrap and 1 layer of aluminum foil for up to 6 months. Let thaw overnight in the refrigerator before enjoying, or reheat directly from frozen in a 350°F oven until warmed through.
Serving Suggestions
Slice the freshly baked bread and try it with Cucumber Sandwiches, Chicken Club Sandwich, or Egg Salad Sandwich.
Or just use your air fryer and make some Grilled Cheese Sandwich or Air Fryer Egg Sandwich. I have also made a pizza with this bread!
5-Star Review
I made this bread and it is so moist and delicious 😋. I served it as an appetizer to family and friends and they absolutely loved it. I ended up making 2 more batches for friends. This is a recipe I have added to my recipe collection. Thank you so much for sharing your delicious recipe. – Catherine
Skillet Bread Recipe
Equipment
- Kitchen Scale (optional)
- Stand Mixer (optional)
- 8-inch Cast Iron Skillet
Ingredients
- 1½ cups water 342 grams, warm (105-110°F)
- 2 tablespoons granulated sugar 25 grams
- 2½ teaspoons active dry yeast 7 grams (1 envelope)
- 2 tablespoons unsalted butter 28 grams, melted and cooled (¼ stick)
- 1 tablespoon honey 22 grams
- 1 teaspoon kosher salt 3 grams
- 3½ cups all-purpose flour 420 grams, plus more as needed
Instructions
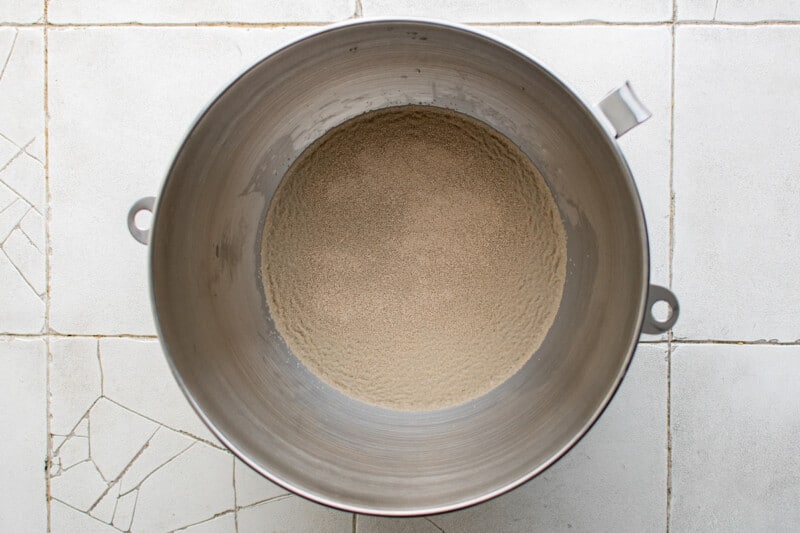
- Whisk the water and sugar together in the bowl of a stand mixer (or a regular bowl if you’re mixing the dough by hand).1½ cups water, 2 tablespoons granulated sugar
- Sprinkle the yeast on top then let it bloom for 5 minutes.2½ teaspoons active dry yeast

- Stir in the butter, honey, and salt, then gradually stir in 3½ cups of the flour.2 tablespoons unsalted butter, 1 tablespoon honey, 1 teaspoon kosher salt, 3½ cups all-purpose flour
- Knead in the bowl of a stand mixer fitted with the dough hook for 5-6 minutes, sprinkling in a bit a flour if it’s still sticking to the sides. Don’t add too much flour or the bread will be thick and heavy. Or if kneading by hand, knead for 8-10 minutes, adding a light dust of flour when it gets too sticky to handle. The dough should still be tacky but not wet.
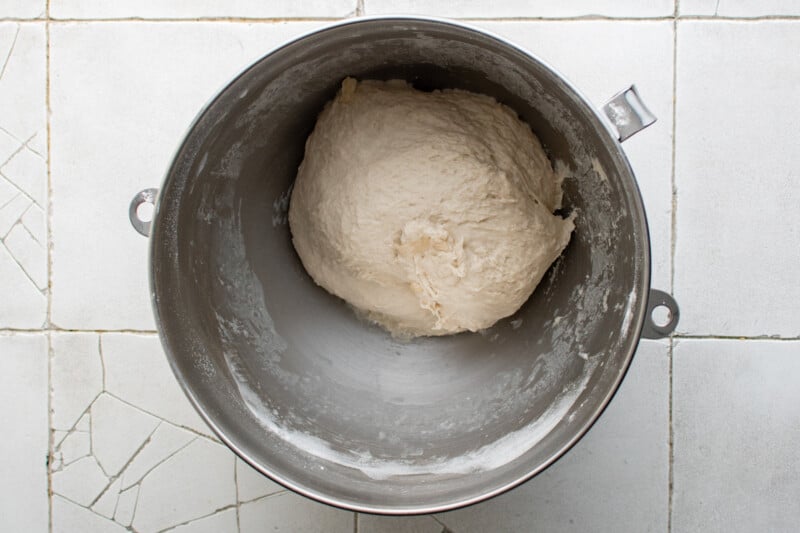
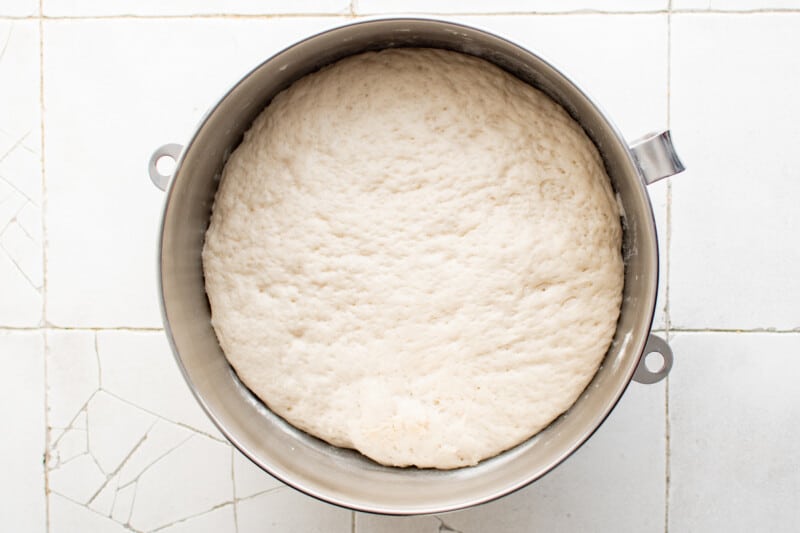
- Form the dough into a ball then place it in a large bowl and cover it with plastic wrap. Let rise at room temperature for 2 hours, or until it has doubled in size.
- Preheat oven to 400°F and spray an 8-inch cast iron skillet with nonstick spray. Set aside.
- Sprinkle some flour onto a clean work surface, then turn the dough out on top and knead it a few times. Tuck the ends into itself and form it into a ball.
- Place it into the prepared pan then gently press the dough out into the pan and cut the top with a very sharp knife into whatever design that you prefer.
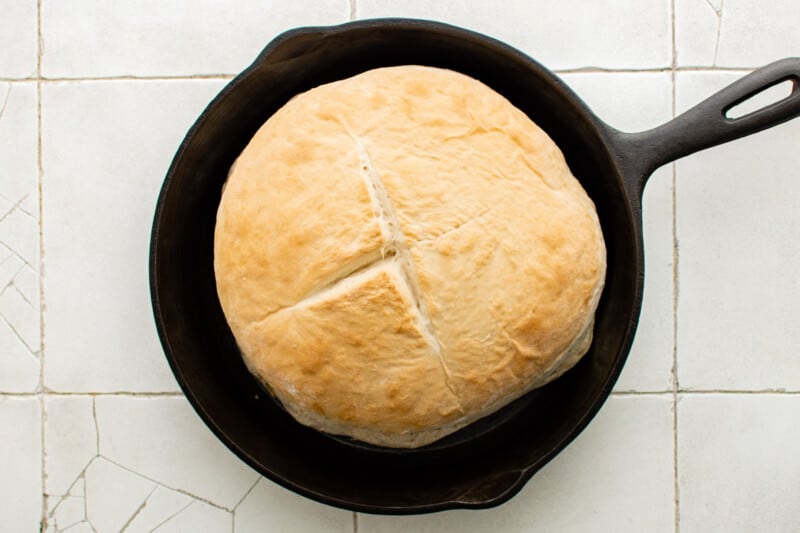
- Bake for 20-25 minutes, or until the top is golden brown. Let it rest for at least 15 minutes before slicing and serving with room temperature butter and honey, if desired.


Video
Becky’s Tips
- If using instant yeast, you can mix the flour, sugar, and yeast together and skip straight to step 3.
- For chewier, crustier skillet bread, use bread flour in place of some or all of the all-purpose flour.
- In place of the butter, you can use neutral oil or olive oil.
- Omit the honey for a more savory bread.
- Feel free to add the herbs of your choice to this bread, such as rosemary, basil, or thyme!
- You could also add granulated garlic or onion.
- For a softer crust, brush the bread with butter as soon as it comes out of the oven.
- Check your yeast before using it. If it is past its expiration date, toss it and use a new envelope.
- Knead the dough until it is tacky, but not wet. It should be somewhat smooth.
- Perfectly proofed bread dough will spring back slowly when poked with a clean finger. If the dough springs back quickly, it needs more time; if the does not spring back at all, it is over-proofed.
- If your kitchen is too cold and your dough is not rising, place the bread dough in your turned-off oven with just the light on.
- Bake this bread only in a cast iron skillet. A different type of skillet will not get hot enough or distribute the heat evenly enough.
- Fully baked bread will read 200°F on an instant-read thermometer.
Nutrition information is automatically calculated, so should only be used as an approximation.
How to Make Skillet Bread
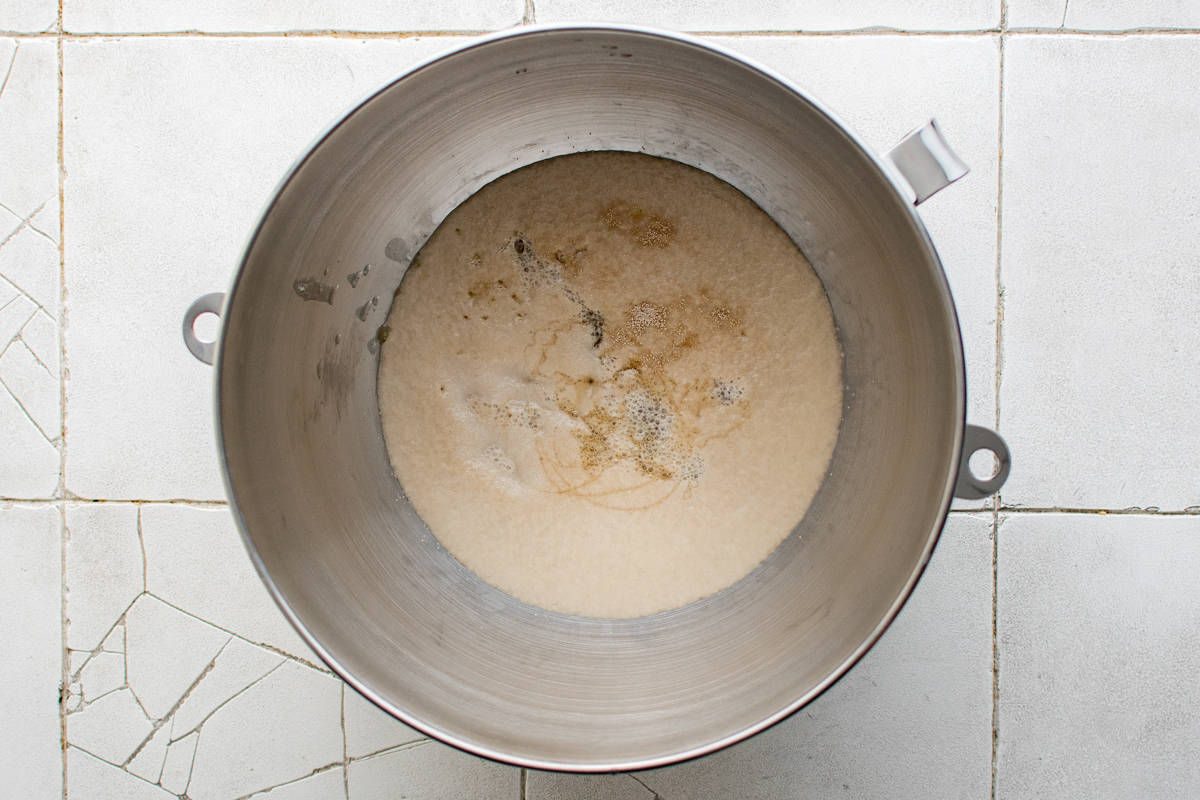
Proof the yeast: In the bowl of a stand mixer, whisk the 1½ cups of water and 2 tablespoons of granulated sugar together. (or a regular bowl if you’re mixing the dough by hand). Add 2½ teaspoons of active dry yeast and allow it to activate.
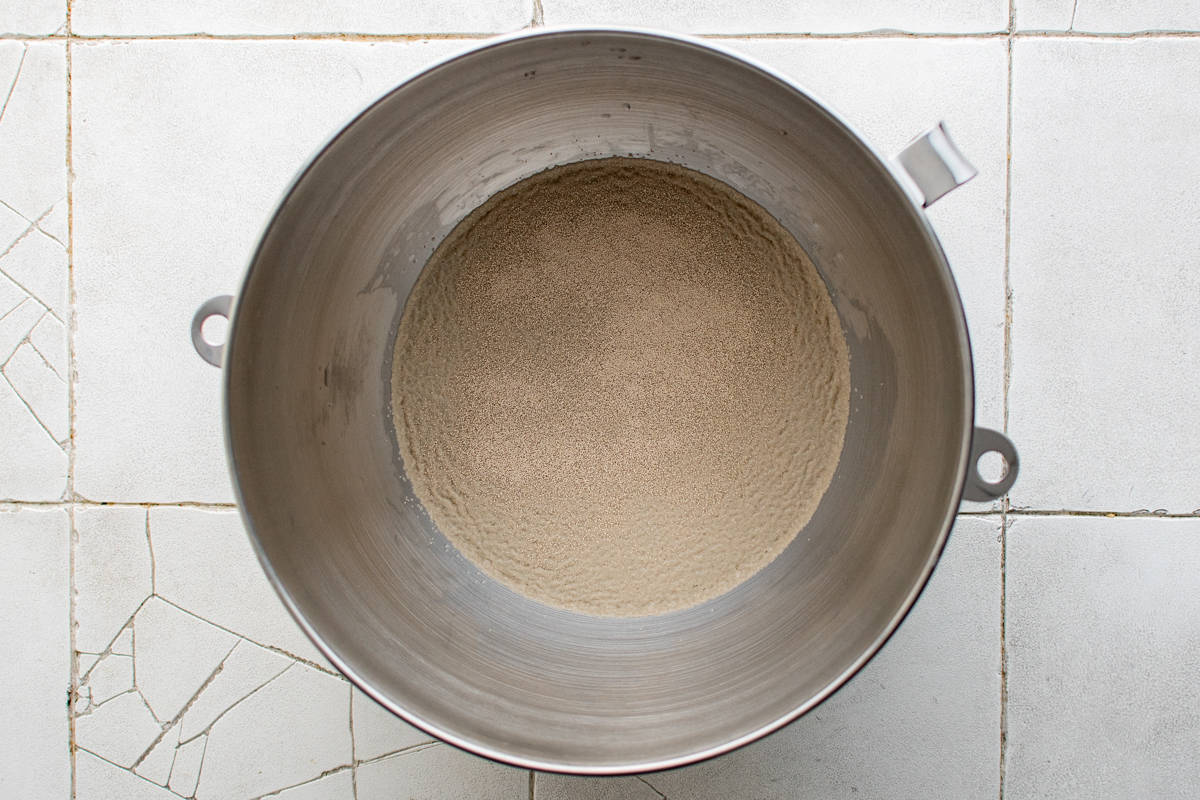
Wait about 5 minutes and yeast will bloom and be ready to use.
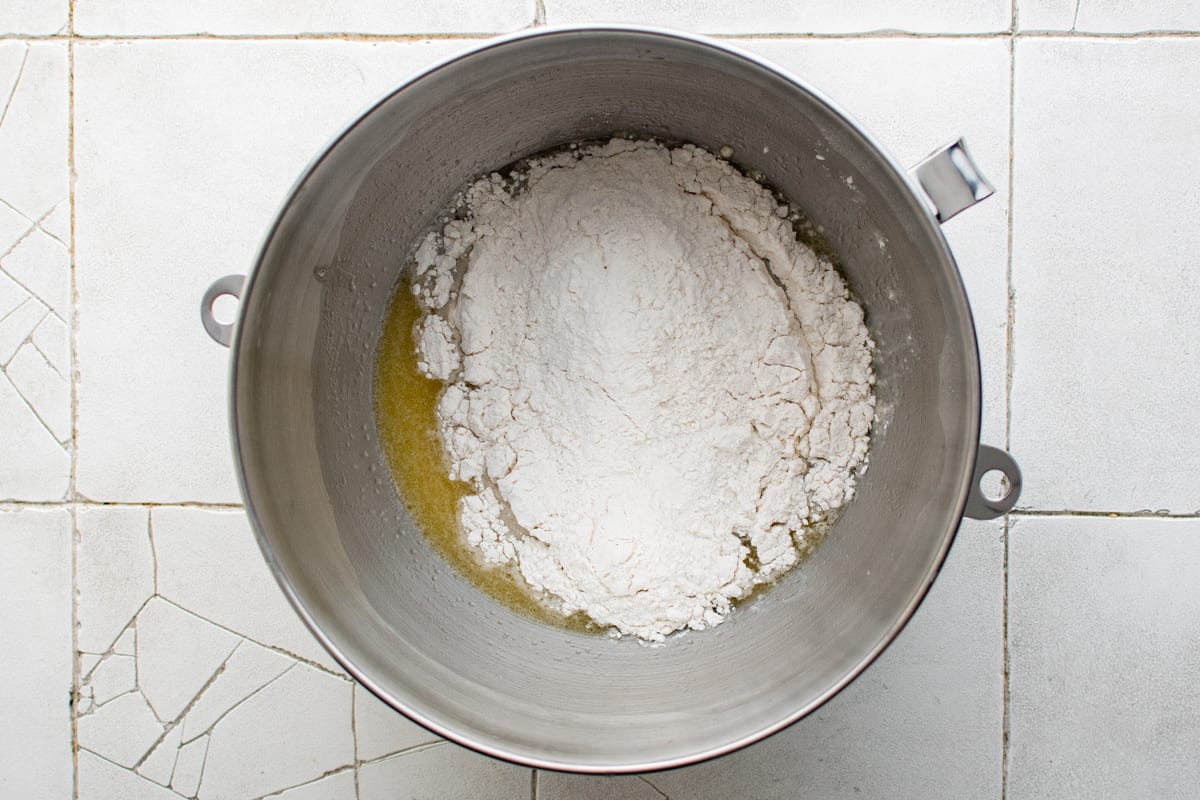
Prepare the dough: In the same bowl add 2 tablespoons of unsalted butter, 1 tablespoon of honey and 1 teaspoon of kosher salt. Stir to combine all. Gradually add 3½ cups of all-purpose flour and bring everything together in a dough like consistency.
Knead in the bowl of a stand mixer fitted with the dough hook for 5-6 minutes, sprinkling in a bit a flour if it’s still sticking to the sides. Don’t add too much flour or the bread will be thick and heavy. Or if kneading by hand, knead for 8-10 minutes, adding a light dust of flour when it gets too sticky to handle. The dough should still be tacky but not wet.

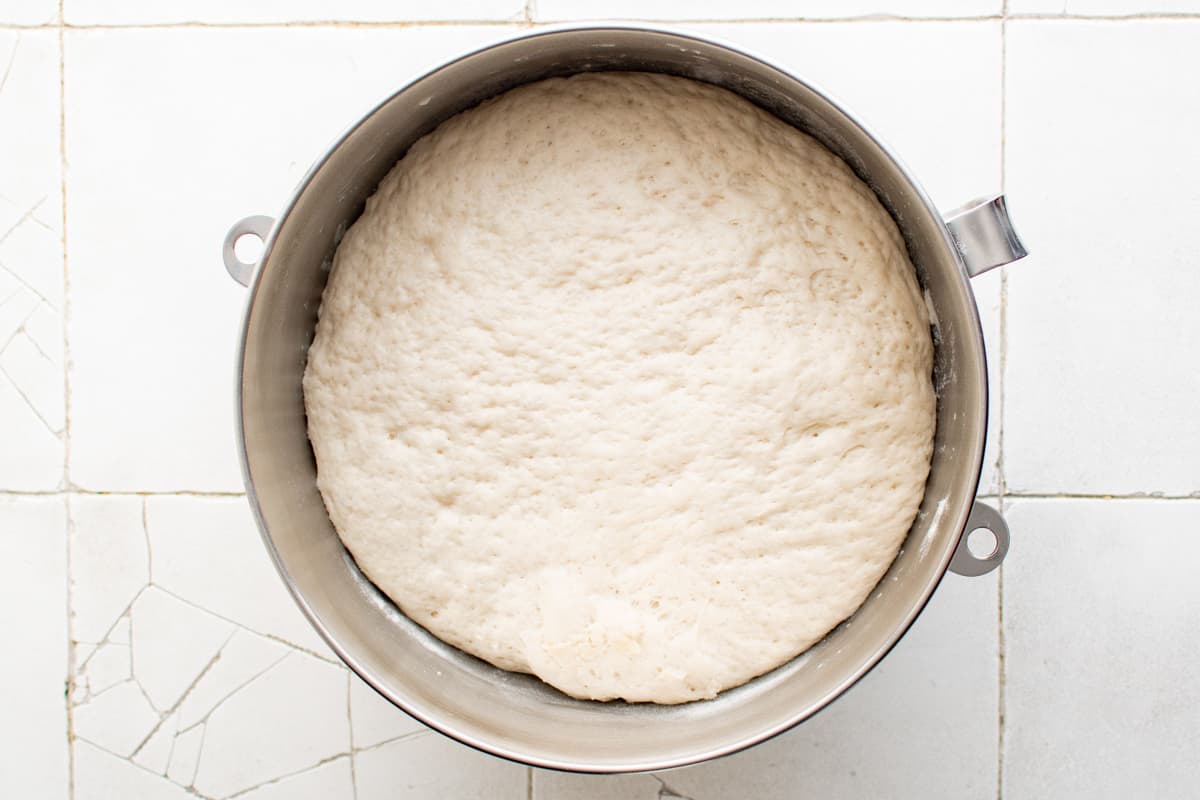
Proof the dough: Form the dough into a ball and place it in a large bowl. Cover it with plastic wrap and let it rise at room temperature for two hours or until it has doubled in size.
Preheat the oven: Preheat the oven and prepare the cast iron pan, spray an 8-inch cast iron skillet with nonstick spray. Set aside.
Bake & Serve: Sprinkle flour onto a smooth surface. Turn and knead dough. Tuck ends into itself to form a ball.
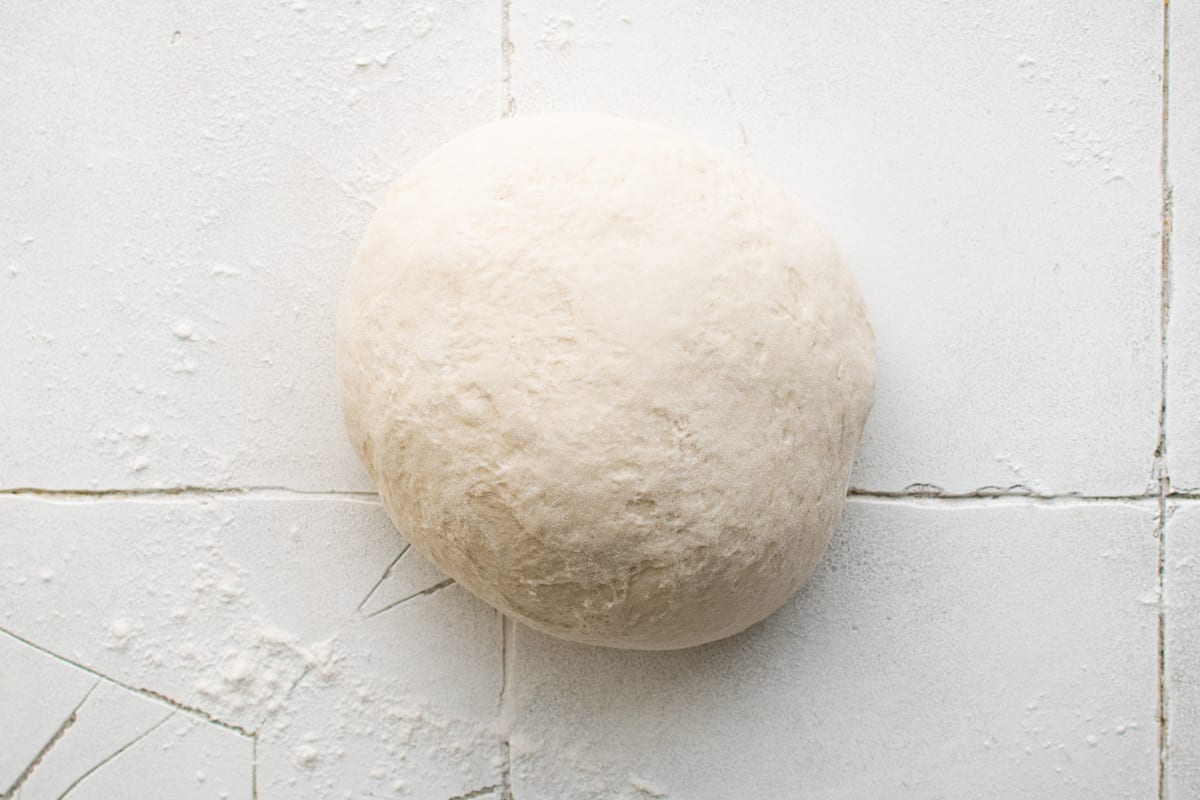
Place in prepared pan and press dough into it. Cut the top with a very sharp knife into whatever design that you prefer.
Bake until golden brown then let it rest for at least 15 minutes. Slice, serve, and enjoy!

I hope you find this skillet bread easy to make and delightful to taste! Let me know in the comments below how your bread turned out and what you paired it with!


After my dough doubled in size and I dumped it out to knead prior to putting it on thr skillet- the inside dough was so sticky. What did I do wrong?
Hi Lisa, this bread dough is meant to be a bit sticky, but if it is too sticky to work with, you can simply add more flour, a little at a time, until it is workable.
I made this bread and it is so moist and delicious 😋. I served it as an appetizer to family and friends and they absolutely loved it. I ended up making 2 more batches for friends. This is a recipe I have added to my recipe collection. Thank you so much for sharing your delicious recipe.
Awesome and quick. Thank you
Thank you
Usually when I make bread I do a second rise after I put the dough in a pan. This doesn’t do that am I correct?
Correct, no second rise!
This bread sounds easy and delicious. Can the dough be divided and baked in a smaller cast iron pan? Can the dough be frozen for later use, if divided?
I have not tried the recipe yet.
Yes, you can divide it and bake in a smaller pan! The dough can be frozen for up to 6 months. Let thaw in the refrigerator overnight, then let rise for 2 hours at room temperature before baking.