Baked Eggs are a quick and simple dish that only requires a couple of basic ingredients and 15 minutes in the oven. You can create endless variations on these eggs by mixing in your favorite ingredients. It’s the best way to cook eggs when everyone wants their own unique version for brunch or breakfast!

What’s in This Baked Eggs Recipe?
- Butter: Unsalted butter prevents the eggs from sticking to the ramekins, allowing for easy removal.
- Eggs: We use 8 large eggs in this recipe, 2 eggs per ramekin.
- Salt + Pepper: Enhance the natural flavor of the eggs.
Notes from the Test Kitchen
With just 3 ingredients and 5 minutes of prep, these oven baked eggs couldn’t be easier to make! Eggs are chock full of high-quality protein and omega-3, making them a great choice for breakfast, lunch, or dinner. Plus, they’re endlessly customizable. Top these eggs with feta or Parmesan cheese, sun-dried tomatoes, fresh herbs, and/or bacon crumbles!
Variations on Oven Baked Eggs
This recipe is the perfect blank canvas for the eggs of your dreams. Add different cheeses, like mozzarella, pepper jack, Monterey jack, Swiss, or cheddar. Crumble up some sausage, dice up some ham, or add your favorite sautéed veggies. The possibilities are endless! Simply add your toppings of choice into the cups with the eggs before baking.

How to Store and Reheat
Store leftover baked eggs tightly covered with plastic wrap or aluminum foil in the refrigerator for up to 5 days. Reheat in the microwave in 15-second increments until warmed through.
How to Freeze
Freeze these egg ramekins tightly covered with 2 layers of plastic wrap and 1 layer of aluminum foil for up to 3 months. Let thaw overnight in the refrigerator before reheating.
Serving Suggestions
Serve these soft oven-baked eggs with toasted no knead bread, English muffins, or croissants for dipping. This simple dish is crowd-friendly (since everyone can choose their own toppings), so try it for Mother’s Day brunch or breakfast on Christmas morning.

Baked Eggs Recipe

Equipment
- 4 Ramekin(s)
Ingredients
- 2 tablespoons unsalted butter melted (¼ stick)
- 8 large eggs
- Kosher salt and freshly ground black pepper to taste
Optional Toppings
- Feta cheese
- Parmesan cheese
- Sun-dried tomatoes
- Fresh herbs
- Bacon crumbles
Instructions
- Preheat oven to 350°F. Brush the insides of 4 ramekins with melted butter.2 tablespoons unsalted butter
- Crack 2 eggs into each ramekin.8 large eggs
- Sprinkle salt and pepper over the eggs.Kosher salt and freshly ground black pepper
- Add on your favorite toppings if desired.Feta cheese, Parmesan cheese, Sun-dried tomatoes, Fresh herbs, Bacon crumbles
- Bake for 14-17 minutes, or until the whites are set and the yolk is cooked to your desired doneness.
Becky’s Tips
- Gently poke the top of the yolk with the pad of your finger to test for doneness. If the yolk bounces back, it is done. If it ripples, it needs more time. If it feels firm, it is overdone.
- Nutritional information does not include optional toppings.
Nutrition information is automatically calculated, so should only be used as an approximation.
How to Make Baked Eggs Step by Step
Prep the Ramekins: Preheat your oven to 350°F. Brush the insides of 4 ramekins with 2 tablespoons of melted unsalted butter.
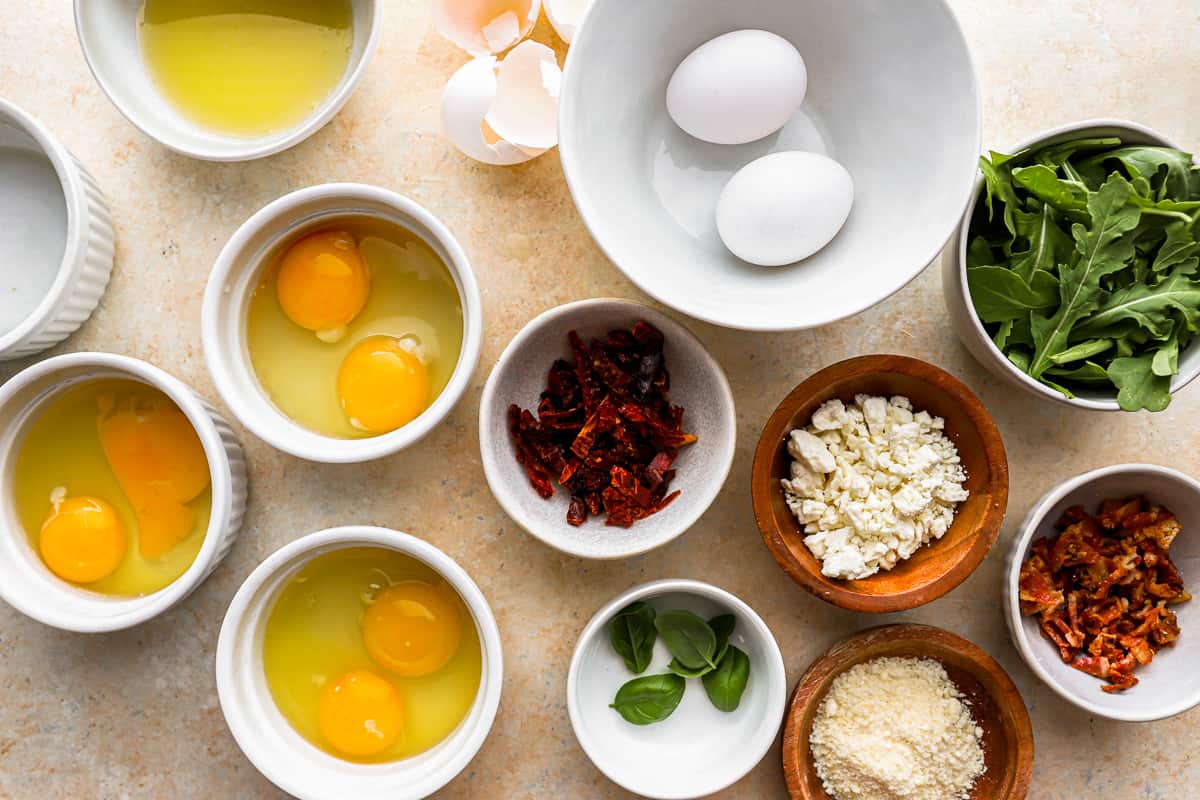
Season the Eggs: Crack 2 eggs into each ramekin. Sprinkle salt and pepper over the eggs. Add on your favorite toppings if desired.

Bake the Eggs: Bake for 14-17 minutes, or until the whites are set and the yolk is cooked to your desired doneness.

It only takes about 15 minutes to bake these eggs in a 350°F oven.
I don’t think one is better than the other. Both types can be cooked to your preferred level of doneness, but baking eggs is certainly a bit easier and more hands-off than boiling them!
This is something you’ll get the hang of over time! To check, gently shake the ramekins: the egg yolk itself should jiggle very slightly when you do this, while the whites around it remain firmer. You can also gently poke the top of the yolk with the pad of your finger to test for doneness. If the yolk bounces back, it is done; if it ripples, it needs more time; if it feels firm, it is overdone.
Yes! In fact, this can happen in a matter of just 30 seconds or so. Watch carefully and check often the first few times you make this dish. Soon, you’ll get a feel for how long it takes in your oven, and before you know it, you’ll be able to make these perfectly without checking on them at all!








Look forward to trying this! I do have a question, though. I have 2 porcelain lined cast iron mini casseroles that I would love to try using for this dish. Do you think they would work? They’re so cute that I love using them. I know – that sounds dumb, right? Anyway, thanks for listening; I love your blog.
They sound like they’d be perfect!